When you press the spacebar to start playback in Cubase, it typically begins with a slight delay. This startup latency depends on various settings, and in some cases, it can be significant enough to affect your workflow.
This article highlights the factors that influence playback start delay and explains how to configure them for a responsive and comfortable transport experience.
By implementing these measures, you may also see improved responsiveness in various editing tasks, including MIDI and audio data manipulation.
1. Audio Interface Buffer Size
It goes without saying that the buffer size of your audio interface (the ASIO buffer) affects not only playback latency but also the overall responsiveness of Cubase.
Therefore, users whose workflow centers on real-time recording need to set the smallest possible buffer size in their ASIO settings.
However, the practical buffer size is a trade-off with CPU power, so some compromise is necessary.
If your work is primarily MIDI editing, the need for a very small ASIO buffer decreases, which has the benefit of allowing you to insert more virtual instruments and effects.
However, since the ASIO buffer size also impacts the responsiveness of playback start and MIDI editing, you’ll need to set a reasonably small buffer if you desire a snappy, responsive feel.
2. Latency from Plug-in Effects & VST Instruments
If you experience playback delay or poor responsiveness even with a small audio interface buffer, the latency of plug-in effects inserted on your tracks may be the culprit.
Cubase normally uses a feature called “Plugin Delay Compensation.” This function automatically corrects for the timing discrepancies between tracks caused by plug-in latency, ensuring all tracks are perfectly aligned. This maintains the integrity of your mix by keeping all tracks in sync.
However, because it syncs all other channels to the one with the highest latency, the entire system gets “dragged down” by that single high-latency channel. This results in the “delay in transport and editing operations” that we are addressing.
A common cause is a high-performance mastering plug-in inserted on the master track or a group bus.
I’ve personally experienced a situation where an iZotope Ozone maximizer set to high-quality mode introduced a constant latency of several hundred milliseconds. The delay was so pronounced that I felt a strong sense of discomfort when starting playback or editing notes.
Additionally, latency can accumulate and become significant if you have a long chain of plug-ins on a single channel or a routing setup that passes through many group buses with plug-ins.
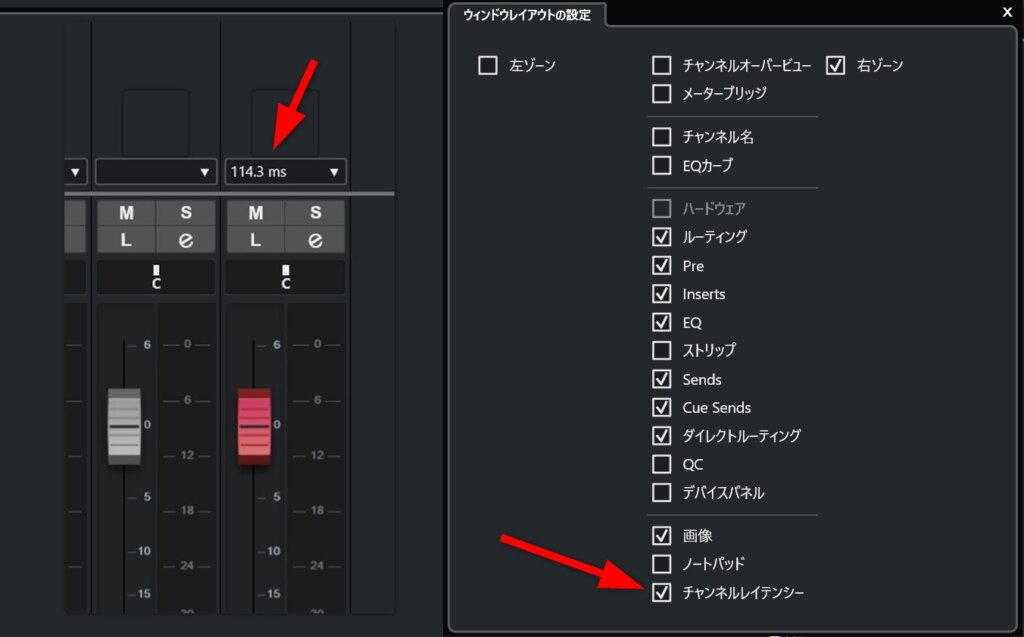
You can check plug-in latency in the MixConsole.
In the “Set up Window Layout” options of the MixConsole, enable “Channel Latency.” This will display the total latency value above each channel fader.
Clicking on this value will show you the individual latency of each plug-in inserted on that channel.
Once you’ve identified a plug-in with high latency, a good practice is to disable it until the final stages of production or replace it with a lighter, alternative plug-in.
Some plug-ins feature a low-latency mode (often called LIVE mode). Enabling this can reduce latency. (For Steinberg’s bundled plug-ins, the “LIVE” button toggles this mode).
Another solution, which I recommend for practical production work, is to use the “Constrain Delay Compensation” feature, explained next.
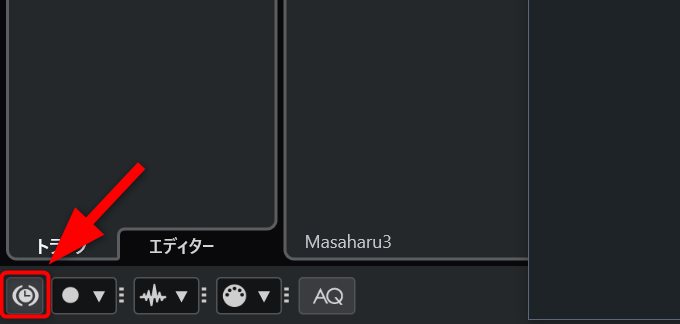
Using “Constrain Delay Compensation” as a Solution
The “Constrain Delay Compensation” feature allows you to reduce latency for various operations.
However, it’s crucial to understand how Cubase behaves when this function is active.
The button for “Constrain Delay Compensation” is located as shown in the image below (I recommend assigning it to an easy-to-press shortcut key).
When “Constrain Delay Compensation” is enabled, any plug-in causing latency above a set threshold is temporarily bypassed, thereby reducing the overall system latency.
Be aware that this will change the sound of your project because heavy plug-ins are forcibly bypassed. (For example, if a compressor or limiter is bypassed, the monitor volume and sound character will change).
By default, this feature is set to bypass any plug-in with even a small amount of latency. You can minimize the change in sound quality by specifying an acceptable latency threshold beforehand.
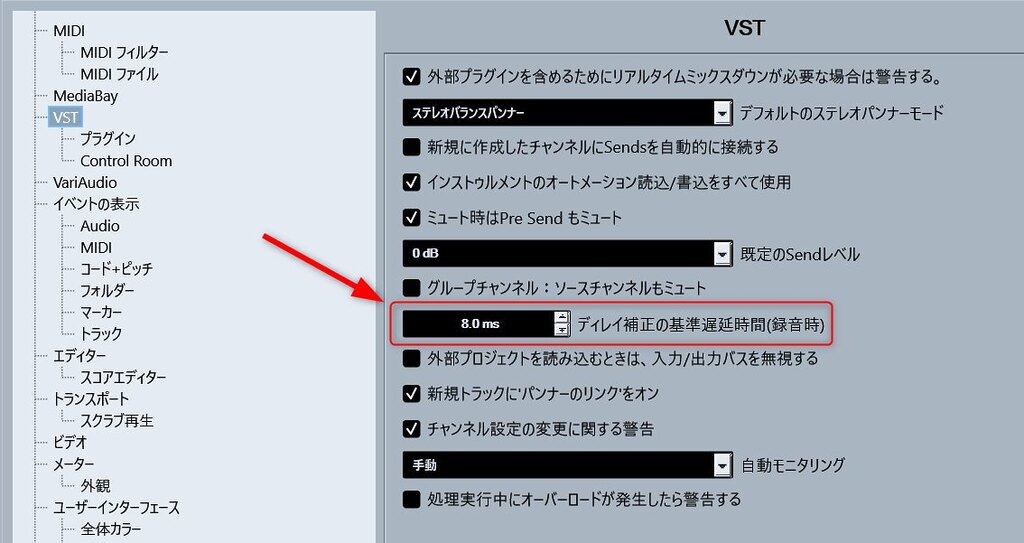
The setting for this threshold is “Delay Compensation Threshold” found under the “VST” section in the Preferences (see image below).
Also, note that plug-ins inserted on FX tracks are not affected. This allows you to create a workaround routing for essential high-latency plug-ins by using an FX track, thus bypassing the “Constrain Delay Compensation” feature for them.
By toggling “Constrain Delay Compensation” with a shortcut key, you can easily manage the trade-off between latency and sound quality (the effect of your plug-ins) depending on whether you are editing, recording, or playing back.
Note on Vienna Ensemble Pro Buffer Settings
If you are producing orchestral mock-ups, you might be using Vienna Ensemble Pro (VEP).
In that case, be aware that VEP’s buffer size also affects the overall responsiveness of Cubase.
I recommend avoiding unnecessarily large buffer sizes and keeping them at the minimum required for your project.
An overly large buffer not only causes playback delay but can also lead to issues like auditioning notes not sounding correctly in the Key Editor.
As official advice suggests, start with a buffer setting of 2 and only increase it if you encounter dropouts or clicks due to CPU overload.
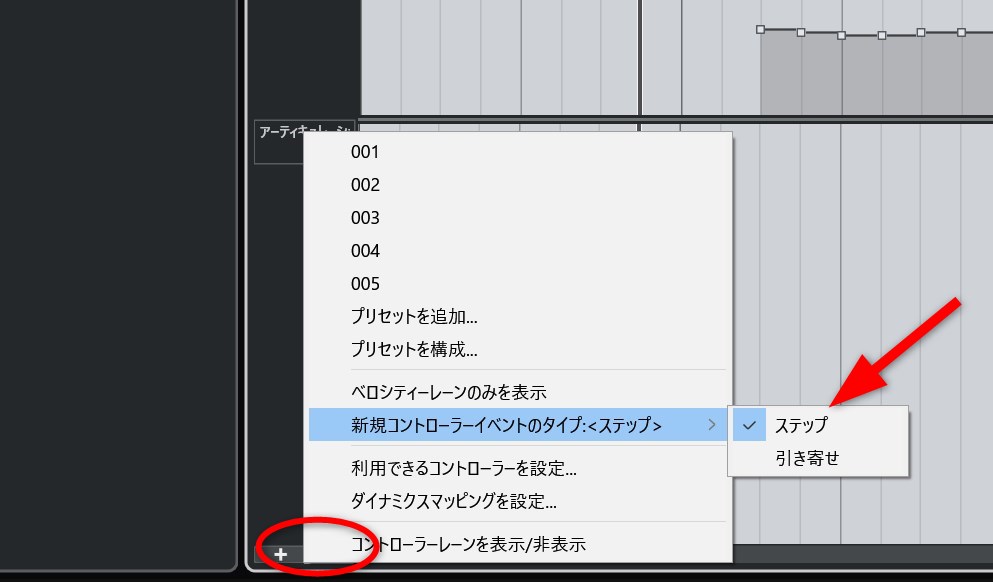
3. MIDI Latency Mode Setting
This is an often-overlooked setting, but adjusting the MIDI Latency Mode can significantly reduce playback start delay and improve responsiveness in Cubase.
The MIDI Latency Mode setting is located in the “MIDI” section of the Preferences.
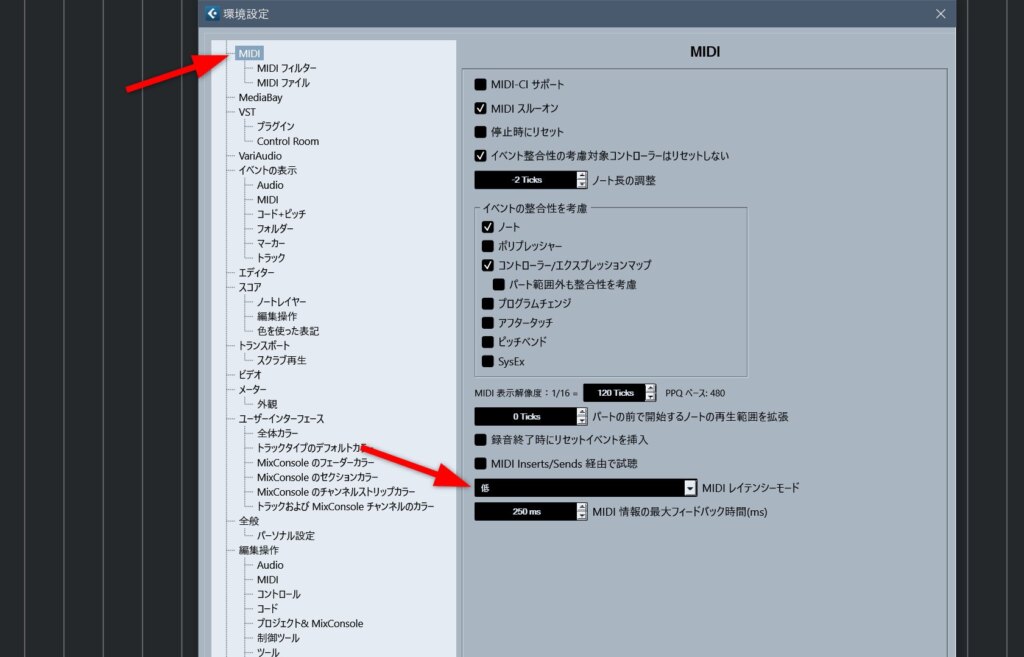
The default setting is “Standard,” but changing it to “Low” will improve playback start responsiveness.
According to Steinberg’s documentation, setting MIDI latency to “Low” increases CPU load, but for modern CPUs, the difference is negligible.
In fact, I regularly use the “Low” setting on an older Windows machine with an i5-8400 processor and have observed no difference compared to the “Standard” setting (the CPU meter shows no visible change).
You will notice a tangible improvement in playback start responsiveness when you change the MIDI latency setting. Unless you encounter any issues, I highly recommend using the “Low” setting.
Based on the official manual, you are unlikely to face any problems unless you are playing back extremely dense controller data across a large number of tracks simultaneously.