In this article, I will introduce logical presets and macros for “selecting only articulation data” on the controller lane of the Key Editor in Cubase.
Normally, to copy and paste articulation data to another MIDI part, you would need to select articulations individually by clicking on them, which tends to be cumbersome and time-consuming.
The image below shows a state where the articulation data after the cursor is selected (the data enclosed in the red frame after the cursor is selected).
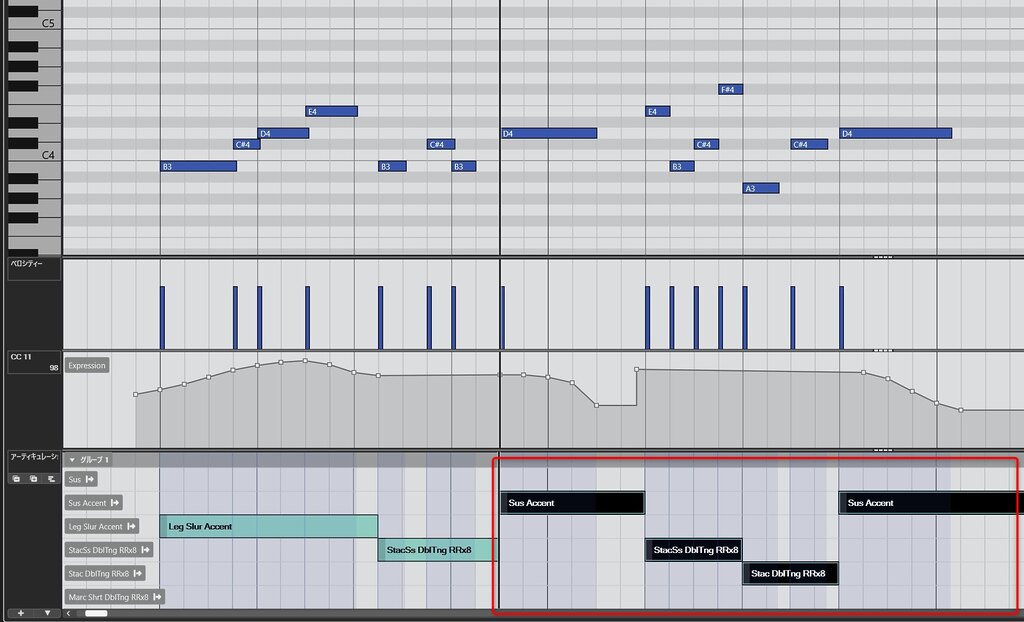
By using the method introduced here, it becomes possible to select and copy/paste articulation data in any given range with a single shortcut key.
How This Macro (Logical Preset) Works
In the current version of Cubase (Ver 15.0.30), the Logical Editor does not have a built-in method to specify articulation data as a target for selection.
However, by selecting all data first and then 〈Deselecting〉 everything other than the articulation data, you can achieve a state where only the articulations are selected.
In other words, rather than “selecting articulations,” we use the reverse approach of “deselecting everything except articulations.”
This macro utilizes this exact mechanism.
Logical Presets to Prepare
Logical Preset for Deselecting Everything Except Articulations
First, create a logical preset to 〈Deselect〉 everything other than articulations from the selected data.
Create the logical preset according to the image and table below, and save it with a preset name like “Deselect Everything Except Articulations”.
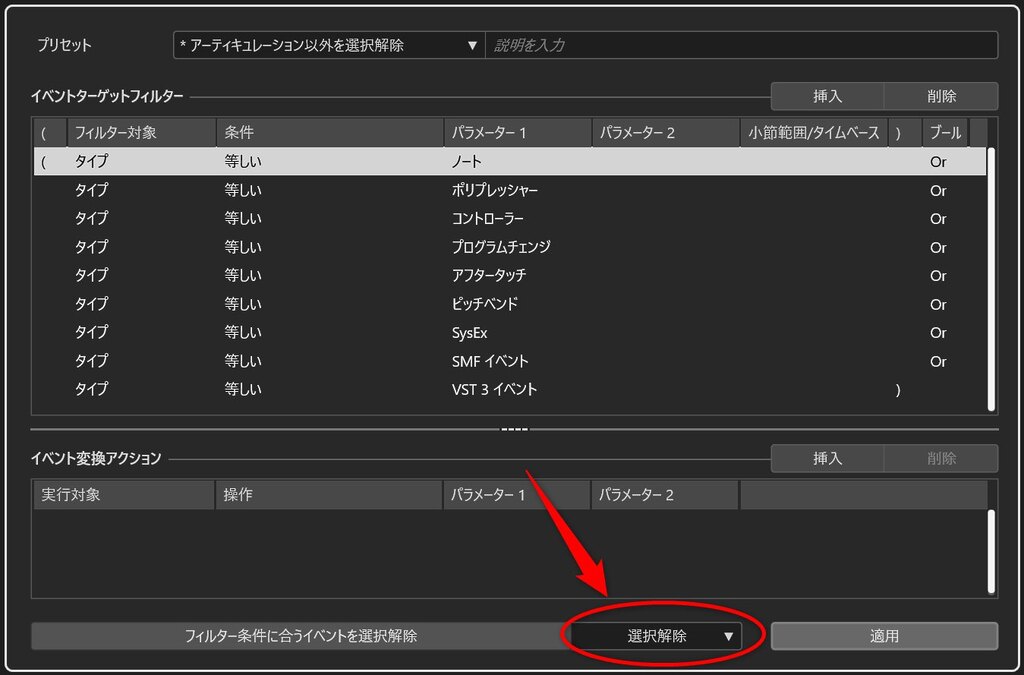
| ( | Filter Target | Condition | Parameter 1 | ) | Bool |
| ( | Type | Equal | Note | Or | |
| Type | Equal | Poly Pressure | Or | ||
| Type | Equal | Controller | Or | ||
| Type | Equal | Program Change | Or | ||
| Type | Equal | Aftertouch | Or | ||
| Type | Equal | Pitchbend | Or | ||
| Type | Equal | SysEx | Or | ||
| Type | Equal | SMF Event | Or | ||
| Type | Equal | VST3 Event | ) |
※Please do not forget to set the parameter circled in red to “Deselect”.
Logical Preset for Specifying the Selection Range
The following selection ranges can be assumed during editing:
- All data within the MIDI part being edited
- Data within the locator range
- Data after the cursor
Among the above, 1 and 2 have standard selection functions, but for 3, a logical preset must be prepared (because even if the standard function “From Cursor to End of Project” is used, articulations are not targeted for selection by design).
To specify the selection range for 3, create and save a logical preset according to the image and table below.
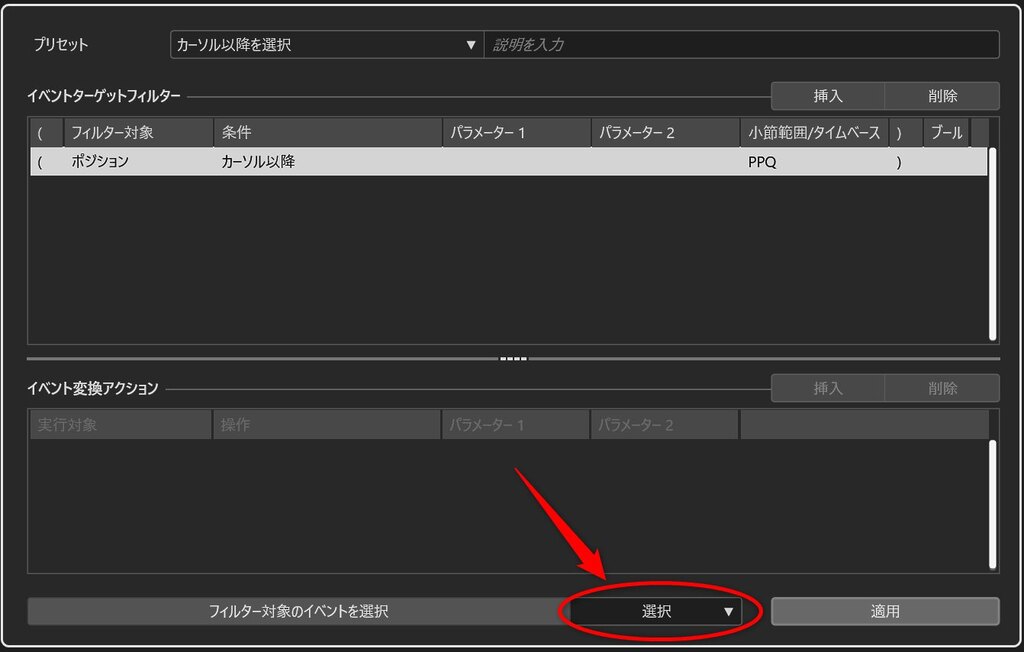
| ( | Filter Target | Condition | Bar Range/Time Base | ) | Bool |
| ( | Position | Beyond Cursor | PPQ | ) |
※Please do not forget to set the parameter circled in red to “Select”.
Creating a Macro to Select Only Articulations
We will now create macros by combining the prepared logical presets with the selection range specifications.
Macro to Select All Articulations in the MIDI Part Being Edited

- Edit – Select All
- Process Logical Preset – Deselect Everything Except Articulations
Macro to Select Articulations Within the Locator Range

- Edit – Select in Loop
- Process Logical Preset – Deselect Everything Except Articulations
Macro to Select Articulations After the Cursor

- Process Logical Preset – Select Beyond Cursor
- Process Logical Preset – Deselect Everything Except Articulations
Assigning Shortcut Keys to Macros
Once the macros are created, assign shortcut keys to them and test their operation.
Final Thoughts
Cubase is equipped with a wide variety of convenient features, including Expression Maps, but there are also features where updates seem to have stalled at present; the articulation selection function could be said to be one of them.
Fortunately, however, Cubase has flexible customization capabilities, making it possible to implement a DIY workaround like the one presented here.
I hope the content of this article will be helpful in your music production.